Oct 13, 2013

{Dining Room Make Over}

We’ve just finished our dining room make over!  And we’re really liking the changes we’ve made!

IMG_4342

Dining Room

We added molding to the entire room.  Painted the walls Sherwin Williams Retreat with one drop of green removed.  The trim is painted Sherwin Williams Extra White to match the existing trim.  I sewed drop cloth curtains using a 9x6 paints drop cloth (about $11 from Lowes).

IMG_4326

IMG_4319

IMG_4332

IMG_4333

IMG_4336


Here are more before pictures:

IMG_4243

IMG_4247

IMG_4250

Erin

Jun 28, 2013

{DIY Window Casings)…to match the doors

A while back, we posted about how to do {DIY Door Casings}…the easy way.  We never would have expected how awesome our entry way casings turned out, or the response we would get from DIYers out there!  Adding charm to our builder grade home was always the goal, and they certainly added that charm we were looking for!

IMG_2868-1

We knew we wanted to do the windows to match, but we just needed the time and money!  Well, we finally got time and the project only cost around $50, so it wasn’t a huge investment.  The investment will be when we finish all the windows in our house, but we’ll do them one-by-one.

Well, the windows are finally done!  Well, at least the dining room window is finished.  We still have six more window sets to do in our downstairs! 

We think they turned out great and we can’t believe how much bigger the addition of casings make the windows look and feel.

window

It was actually pretty easy, and only took a little chunk out of our day to complete. Priming and painting was done the second day after the putty and caulk were dry.

Here are the steps to make this BIG change with HUGE payoff…

Window before

We started with this pretty builder grade window casing, that wasn’t a casing at all, just a sill with a bottom piece of trim wood. 

before

We removed those two pieces by cutting the caulk perimeter with an exacto-knife and then using a hammer to pop off the top, first.  Then we just popped the bottom trim piece off with a hammer.  Our piece were just nailed with finish nails and were not glued, so it was pretty easy just to pry this off.  We didn’t worry too much about damaging the dry wall since we were covering it with new wood, but we didn’t want to wreck the wall or the vertical edges of the drywall surrounding the window.

Once all the old trim was removed, it was time to add the new wood.  We started with this diagram.

IMG

What you’ll need…

For the sill and bottom piece:
1 (1x4) pine lumber – width of your window opening + 1 foot for waste
1 (1x3) mdf – pre-primed – width of your window opening + 1 foot for waste

For the casing around the window:
1 (1x6) mdf – pre-primed - width of your window opening + 1 foot for waste – for the top horizontal piece
2 (1x4) mdf – pre-primed – height of your window opening + 1 foot for waste – for the two vertical side pieces
1 (1x2) pine lumber – width of your window opening + 1 foot for waste
1 cove molding – width of your window opening + 1 foot for waste

Nail gun with finish nails
Saw or Miter box
Wood Putty
Sand Paper
Primer
Trim Paint

Then we added the sill.  This was a 1x4 piece of paint grade (unprimed) pine wood.  This was cut to fit and extended beyond the window opening on each side of the window by 3 1/2 inches + 2 centimeters.  Which means you will need to cut the width of your sill using the width measurement + 7 inches + 4 centimeters, total.  The 3 1/2 inch extension is for the vertical pieces of the wood (that will be going up the window and resting on the over hang), and then the 2 centimeters is for the sill to extend beyond the vertical casing.  Each piece was nailed with our nail gun.

The bottom trim piece is a pre-primed 1x3 piece of mdf and it is cut 4 centimeters shorter.  This will allow for this piece to line up with the vertical casing pieces on either side.

new sill

Then we measured the vertical opening and cut two pieces of 1x4 pre-primed mdf to length and attached them to each side of the window opening.

IMG_4161

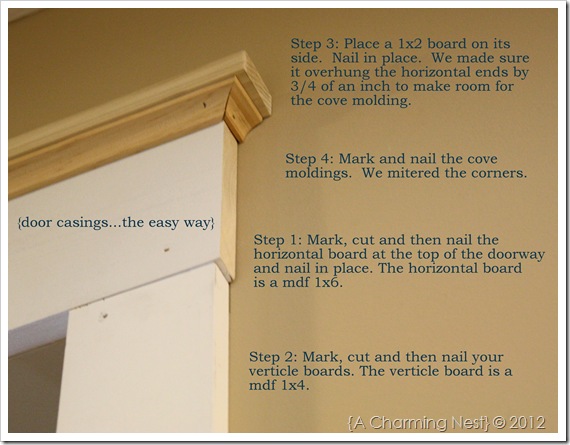
Now, you’re ready to add the top pieces.  This is where the magic happens!  You’re going to follow the {DIY Door Casings} exactly.  Using a horizontal 1x6 mdf measured to the ends (outside) of each vertical casing piece (opening of window + 7 inches). Then lay a 1x2 on it’s side as a ledge – this was wood.  The 1x2 will be cut at a length that allows for the cove molding that will be wrapped around (about 3/4 of an inch on both sides).

IMG_1840

(This picture is from the door casings.)

Once all the pieces have been nailed in place, prime and paint with your trim color.  Our trim color is Sherwin Williams Extra White.  The paint color in this dining room is Restoration Hardware’s Silver Sage.  We will be updating and changing the color in the near future!  We will be adding a version of board and baton to the walls in this room, so we haven’t painted the walls our final color, yet.

IMG_4179

IMG_4184

IMG_4194

I love how they look with the door casings.  I can’t believe how BIG the casings have made our windows look.  We are so happy with the way it looks.

Jun 24, 2013

{So What Happened?}

Dear Readers,

A few months ago, my email account got hacked.  I thought it would be best to close down the account and start again.  When I did that, I did not receive the notification that my domain was expiring and that I needed to pay the fee to keep it active. 

On June 14, I checked the website and it said it was unavailable.  Not really knowing what had happened, I checked and called people (go daddy and blogger)...and they informed me that my domain was bought by a company since it was expired.  They bought it up quickly because they knew that I have traffic (readers) and thought this would be a good chance for them to make some money.  Every hit they get, they get money on the old address.  Have you been there?  They are now a parked page with search engines.  This will create revenue for them in the internet world.  They will not sell it back to me - I made an offer that they refused.

What does this mean for the blog?
I plan on starting again.  I thought I would change the blog to a .net, but I have concerns about keeping the same name and just changing it to a .net.  So, I am changing names to {The Charming Nest} instead of {A Charming Nest}.  Our new address will be www.thecharmingnest.com

Pinterest?
All of the thousands of Pinterest pins will no longer work.  I will try to comment on the highest referred pictures with the new address.  But other than that, I'm not sure if there is anything I can do!  So please...delete the old pins and pin again!  I will start a Pinterest board with all the new links and pins!  Follow and share!

What's in the future?
I will pick up and start again!  People will find me again; I just know it.  The new blog {The Charming Nest} blog will have all the old content that so many love, including the Rast hackmudroom, door casings, and Ikea built-ins.  Also, since it's summer, we are starting some new projects!  Here's our to-do list...

Summer To-Do!
Butterfly/Native Indiana Flower Garden (post coming soon!)
Veggie Garden (post coming soon!)
Paint Den
New Window Casings
Dining Room Paint/Moldings
Bedroom Paint/Moldings
The Kid's Bedroom Paint/Moldings
Basement Finishing - DIY

Be Well,

Jun 23, 2013

{Banana Ice Cream}

Kids love ice cream. Okay. Lets be honest, adults love it, too. I love ice cream. But I've been following a pretty strict diet of no dairy, no grains, and little sugar - most of the time, at least.

Banana ice cream was my answer.   Good for kids and me, plus tasty and cold for those hot summer days (or nights) when you're craving something sweet and need to cool down. 


Banana Ice Cream Recipe
3-4 bananas
1 cup frozen berries
3 tbsp homemade berry jam (optional)
1 cup coconut milk or dairy milk

Before you start, cut up 3-4 RIPE (and they must be ripe or it will not taste right) bananas into 1 inch cubes. Place in the freezer to freeze solid. 

Once the bananas are frozen you are ready to make ice cream. 

Add the frozen bananas to a blender or food processor.  Blend until creamy. 


Add your frozen berries and jam. Blend. 

Once everything is blended and creamy, it's ready to eat as soft serve. Or place in freezer to harden. 

I've had it without berries and it's still good.  I'm sure adding cocoa powder would be awesome, too. Lots of variations to try. Have you tried banana ice cream?  What flavorings have you used?


Enjoy!
Erin

Jun 20, 2013

{Happy Summer...things are a changing}

Hello!  Happy summer!

As you can tell, my blog has changed domains.  Sorry about that!  I know it will take some time for Pinterest pins to bounce back and for pictures to be linked here...

The content is still ALL here!  And I will start posting soon.  I've created a garden, native wildflower buttery sanctuary, and we are getting ready to do our dining room and basement!  I am so excited.


Jan 27, 2013

{Hearty Chicken Soup}

Justin woke this morning and said he felt like having chicken soup.  So, we made chicken soup. 

IMG_4115

Hearty Chicken Soup Recipe

To make the chicken soup broth:

1 cut up whole chicken
4-5 carrots, cut in half
4-5 celery stalks, cut in half
1 onion, cut in half
1/2 bag of frozen leeks from Trader Joes
Salt and Pepper to taste
Add water to cover.

In a large stock pot, add a cut up whole chicken.  (2 drumsticks, 2 thighs, 2 breasts, and 2 wings)  We used a free-range chicken that we got from Honored Prairie.  Add the veggies and covered with fresh, cold water.  Bring to a boil, and then simmer for about 1 1/2 hours.  Stir occasionally to make sure things do not burn.

Strain the broth into a large container.  Separate the chicken and shred.  Skim the fat from the broth as it rises to the top.  (This can be frozen and saved for a later date.)

To make the chicken soup:

2 tbsp olive oil
4 carrots, peeled and diced
4 celery stalks, diced – make sure you use the pretty ones that have the leaves, too…they taste yummy!
1/2 bag of frozen leeks from Trader Joes (use the other half of the bag you had left over from making the broth)
1 onion, diced
shredded chicken
all of the delicious broth you made
3/4 cup wild rice (or brown, or use a mixture of both)
salt and pepper to taste

In the stock pot, add 2 tbsp. of olive oil.  Add the onion and cook until translucent.  Add the carrots (diced), celery (diced), leeks, shredded chicken, 3/4 cup rice, and then the broth.  Add salt and pepper to taste.

Bring to a boil, then lower the heat and simmer for about 1 hour.  Stir occasionally to make sure things aren’t sticking to the bottom.

Enjoy!

Jan 26, 2013

{Superhero Birthday Party!}

My little superhero turned five!  We celebrated as a family on his day, and then invited three friends over for a (small) Superhero Birthday Party. Three very sweet and special five year olds came to celebrate my little man’s day!

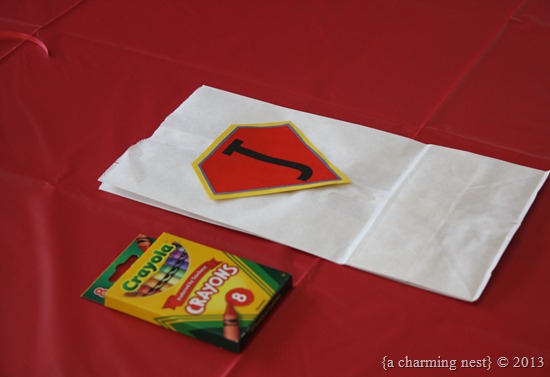
We started with the superhero’s decorating their Superhero Gift Bags.  I had previously made their shields with their initials on a word document, then printed them out on a color printer, and glued them to white paper lunch bags.  Each child got a small box of crayons, which they used to decorate.  I forgot the stickers…
IMG_4093


Their gift bags were used to collect the goodies they found on the Superhero Scavenger Hunt!  My husband came up with pretty cute clues for the scavenger hunt.  At each stop they found sweet treats to fill their bags!
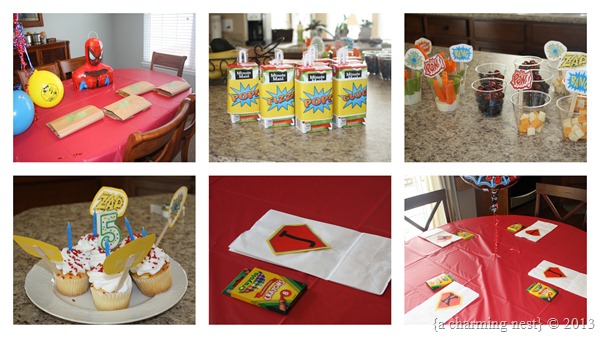
5th birthday party

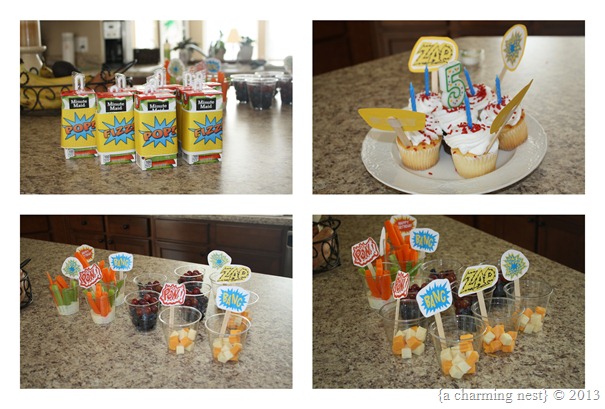
I added Superhero Cupcake toppers and food labels from printables I found HERE.
Just do a Google search, and you will find lots of Superhero stuff out there!

Scavenger Hunt

Your mission, should you choose to accept it:
1. Find your Super Hero Uniform located in the Dining Room, put your uniform on and proceed to step 2.
2. Find the location of the first prize; it is located in the “dungeon”. Be careful, it can be very dark in this location.
3. Next, find your second prize where the boy wearing the blue cape sleeps. Remember to only take 1 prize each.
4. After that, go to the spot in the house where meals are made to collect your next prize you’ll be amazed.
5. Locate your next prize in the machines that keep your clothes clean.
6. Next, find your prize near a source of heat and light, careful, don’t get burned!
7. Find your next prize in the place where Mater and Lightening McQueen would go to dream!
8. After you have located Lightening and Maters’ bedroom, find your next prize where guests would go to rest.
9. You are almost there, just 2 steps left, go to a spot where toys sleep best!
10. What a great job you have done, you’ve found the prizes, go to the kitchen for cupcakes and surprises!

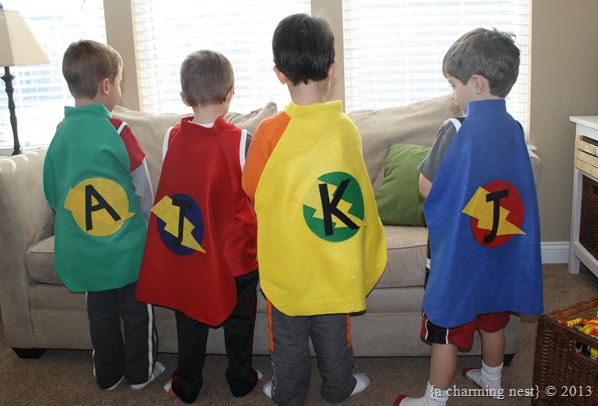
Their first stop was where they found their packages with their individual uniforms: A No-Sew Superhero Cape!  Each cape was made from polyester fleece (a 1/2 yard of fleece will make two capes).  For this party, I made four capes, 1 green, 1 blue, 1 red, and 1 yellow. 
 

IMG_4112

A No-Sew Superhero Cape!

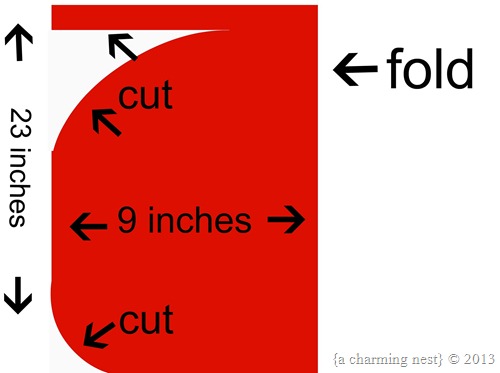
1. First fold your half yard of fabric in half (length of fabric should be about 23 inches, and the width should be about 18 inches, depending on the size of the children (or adults).

Then cut using this pattern:
white1


Then cut felt pieces for the decoration you want for the back.  This is what I did…

2.  Trace a round plate on a piece of pre-cut felt.
3.  Cut four different colors of felt. 
4.  Cut out 4 lightning designs out of yellow felt.
5.  Cut out the letters.  I did not use a template for this, because I could not trace on black felt (did not have chalk).  You could easily use a stencil for this, or trace right from a computer screen (just lay the felt up to the screen and trace with chalk).
6.  Use fuse-able webbing on the back of each shape you want to attach to the cape.  Follow the instructions of whatever you brand you use.  For the brand I had, I just traced each shape and then laid the rough side down on the wrong side of the fabric felt and ironed it on.  I then just peeled the paper off the pieces, and layered them on the backs of the fleece capes and ironed.
7.  Once everything had fused sufficiently, I then added iron Velcro to the tabs.

No sew and pretty easy.  I made four capes in about 2 hours.

I wrapped them in packages made from paper grocery bags, and added their names to the front. 
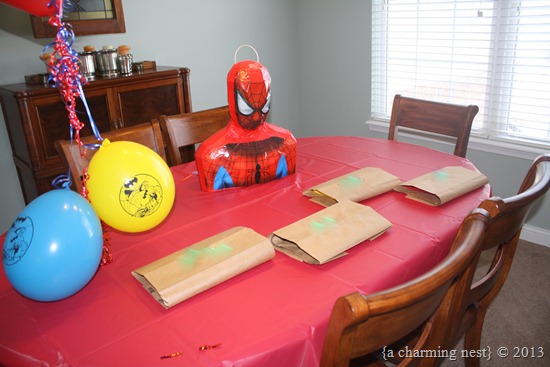
IMG_4079

After the Superhero Scavenger Hunt, they then had Superhero Drinks, Superhero Snacks, made Superhero Pita Pizzas, and Superhero Cupcakes with Superhero Sundae Bar…
5th birthday party1

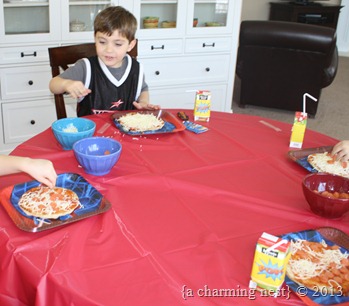
And for the Superhero Pita Pizzas, I used this BASIC recipe:

1 Round Pita
1 tbsp. of spaghetti sauce (or pizza sauce, whatever you prefer)
Various toppings (we used shredded cheese and mini-pepperonis)

Once toppings are on the pizza, pop them on a cookie sheet and bake in the oven at 400 for about 10 minutes.
IMG_4105

…and they were Superhero Easy and Fun, because they could make their own!

For desert, we had cupcakes (which I store bought…I know slacker) and sundaes.  The ice cream was pre-dipped in small clear cups and then we had the toppings for them to make their own. 

Be Well!